Showing posts with label DIY. Show all posts

Monday, November 11, 2013

Sewing needle tote tutorial

Because I can't seem to resist a sale, I have amassed an impressive collection of sewing needles; but I hate the packages they come in - those stupid plastic holders never seem to want to surrender the needles without a fight. Annoying needle packages + fabric scraps I wanted to use up + a chance to procrastinate on the things I should be doing = a sewing needle tote tutorial!

Step 1: Gather supplies. Some felt fabric, mine was 4x7 inches. Cotton fabric, I used a piece 17x21 inches, a cutting mat and rotary cutter - regular and pinking (or fabric scissors), a sewing machine.


Step 2: Iron your cotton fabric, then fold in half, right sides together, leaving the third side open.


Step 3: Turn right side out and press the open edge under about half an inch, toward the inside of the fabric pocket.

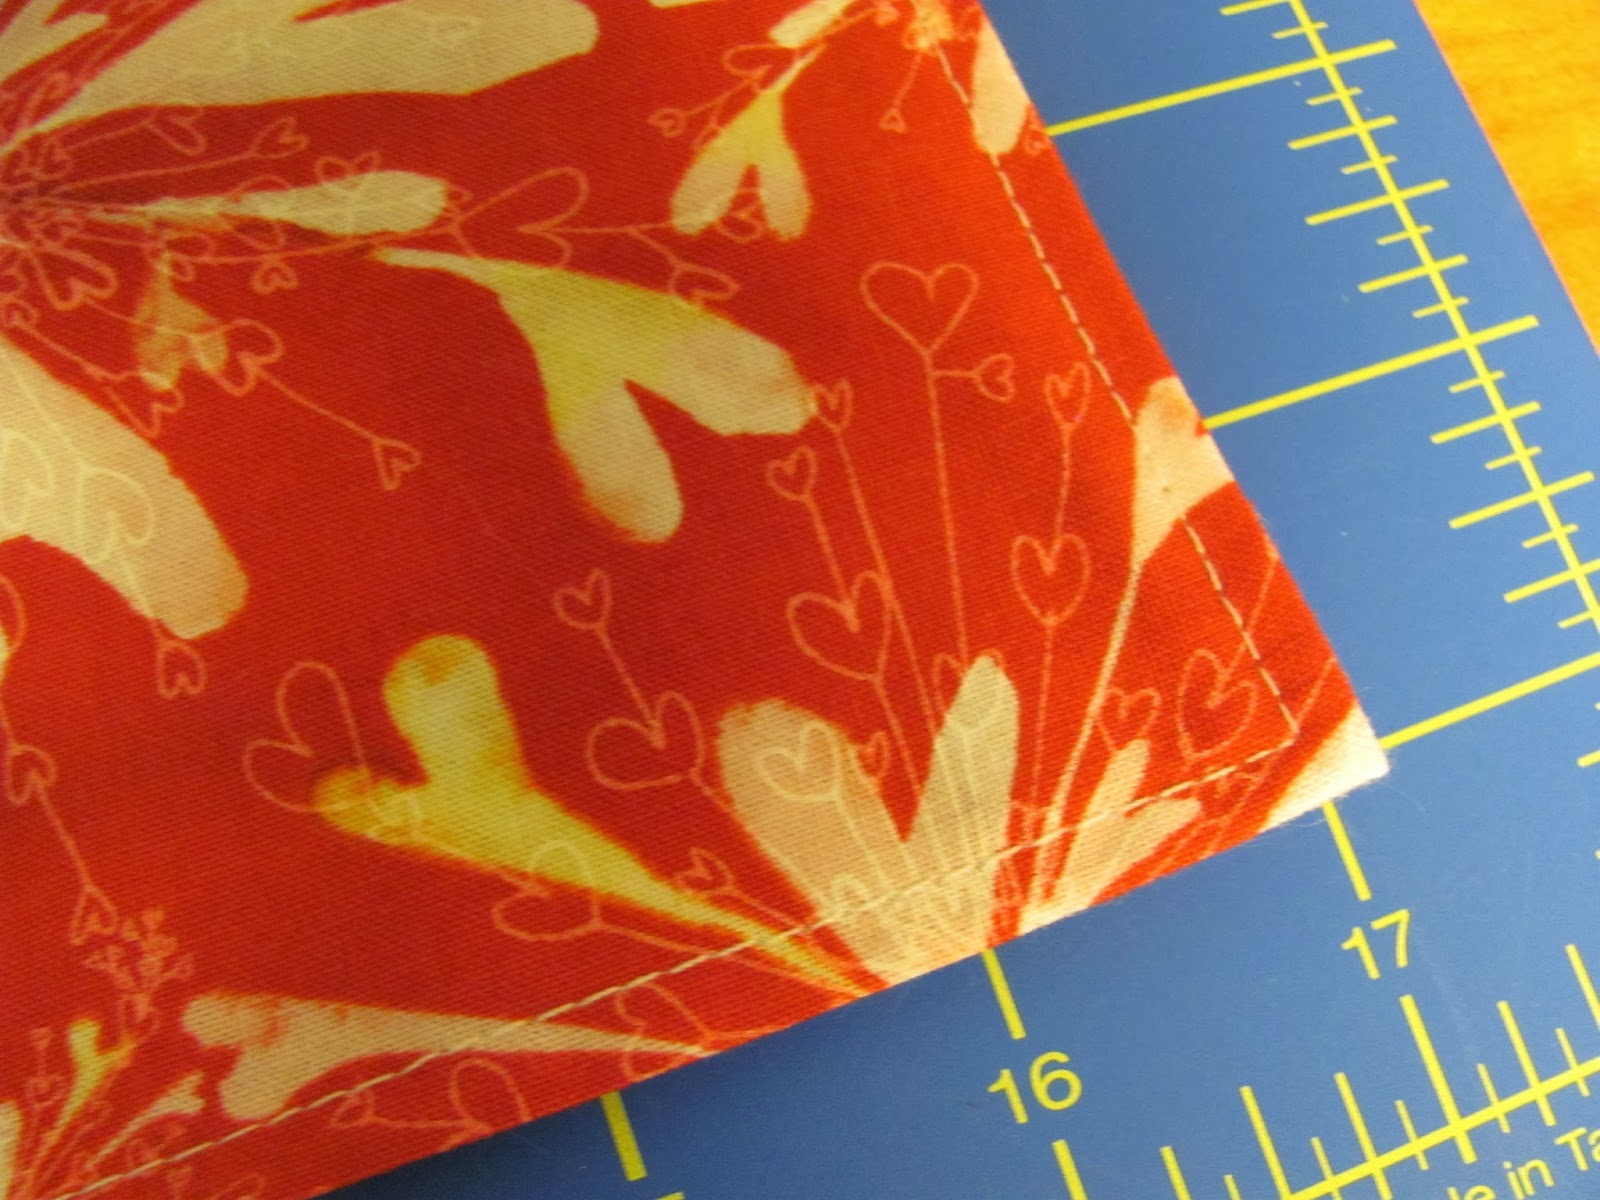
Step 4: Topstitch around the entire piece.


Step 5: Fold each end in to meet in the middle, on the long edge.


Step 6: Fold the bottom and top edges in towards the middle, forming a pocket.


Step 7: Measure the size of the folded fabric. Mine was 8 inches long, 4.5 inches tall.


Step 8: Cut some felt slightly smaller than the folded size. Use pinking scissors or a pinking rotary blade if you want to make it look nicer. I cut mine 7 inches by 4 inches.


Step 9: Take a pin and mark the center of your folded pocket.


Step 10: Cut a piece of ribbon long enough to tie around the pocket. 


Step 11: Sew this to the center front of the pocket


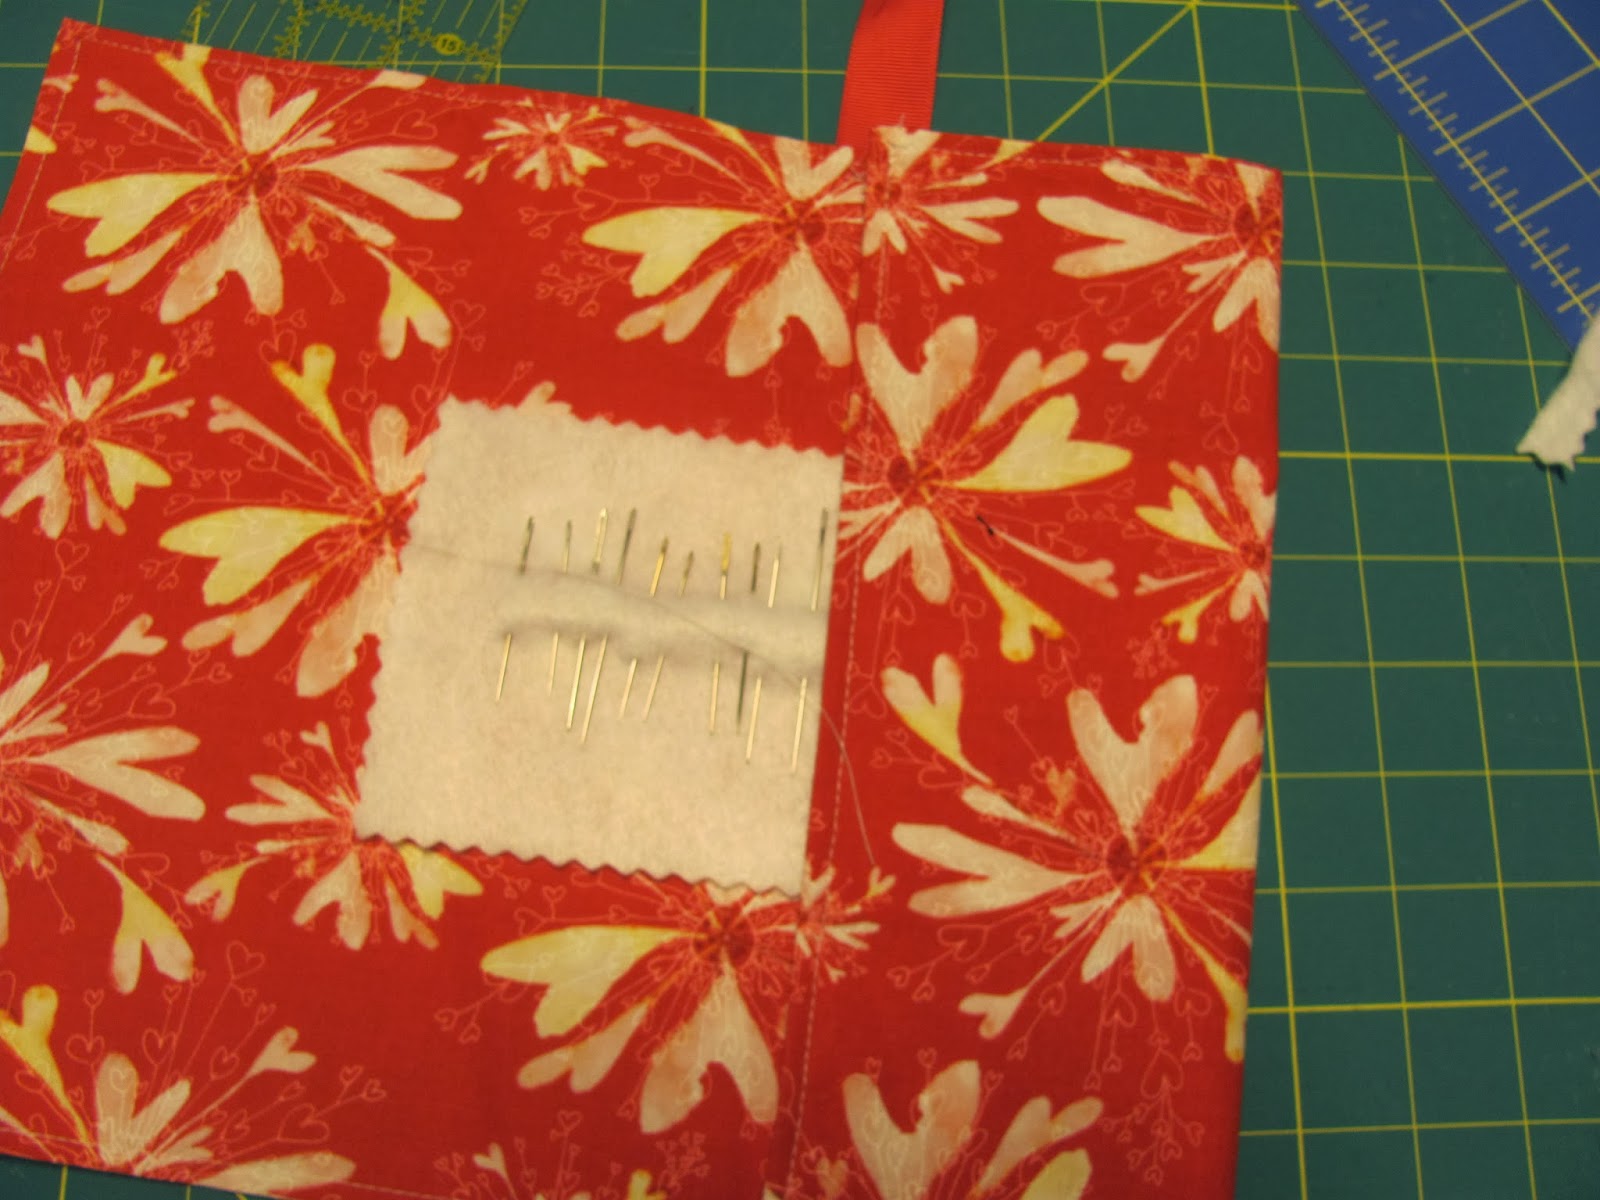
Step 12: Organize your needles by pinning them through the felt sheet. (Or sheets plural, if you are anything like me.)


Step 13: Unfold your pocket fabric and put your needle sheets in the center of your fabric. Fold the pocket up around it and tie the tote closed. Voile! You're done - go enjoy your new tote.

Sunday, September 1, 2013

DIY Unfarm swimming pool

I love to swim. (Or, to be more accurate, I love to doggy paddle.) What I do not love is public pools. I am both extremely shy and less than pleased with my weight right now so the thought of a public pool has as much appeal as a root canal. 

This poses something of a dilemma as we do not have a pool of our own. Aside from a lack of horizontal space due to the location of the Unfarm on a slope, we also have a lack of one other critical resource: money. As with most cases when we are faced with a lack of finances, I was forced to get creative. The solution I came up with is far from ideal, but it serves the critical purposes of cooling me off and allowing me a place to "swim" (read doggy paddling and kicking.) And so, the Unfarmgirl swimming pool was born. 


True, it looks remarkably like a 2 foot wide, 3 foot deep, 8 foot long metal livestock tank, but make no mistake: it's a swimming pool. Should any other Unfarmgirls out there want to learn how to make this Unfarm swimming pool, I have put together a tutorial to explain the complicated process. Ready? Got your pencil handy to take notes? Here we go.

DIY Unfarm swimming pool tutorial

Step one: Purchase livestock tank of appropriate size. If you can find it, a three foot wide tank would probably be a bit nicer, but a two footer will also work. 

Step two: Bring said tank home. 

Step three: Find appropriate location for tank and position it. A spot that gets some sun and is relatively flat works best.

Step four: Fill tank with water

Step five: Enjoy!

Did you get all that? I know it can be a bit overwhelming, but take it one step at a time and I'm sure you'll be able to manage it.