Step 1: Gather supplies. Some felt fabric, mine was 4x7 inches. Cotton fabric, I used a piece 17x21 inches, a cutting mat and rotary cutter - regular and pinking (or fabric scissors), a sewing machine.
Step 2: Iron your cotton fabric, then fold in half, right sides together, leaving the third side open.
Step 3: Turn right side out and press the open edge under about half an inch, toward the inside of the fabric pocket.
Step 4: Topstitch around the entire piece.
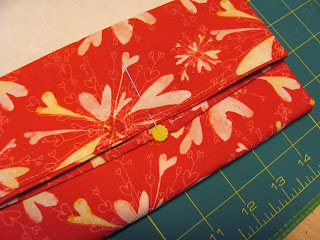
Step 5: Fold each end in to meet in the middle, on the long edge.
Step 7: Measure the size of the folded fabric. Mine was 8 inches long, 4.5 inches tall.
Step 8: Cut some felt slightly smaller than the folded size. Use pinking scissors or a pinking rotary blade if you want to make it look nicer. I cut mine 7 inches by 4 inches.
Step 9: Take a pin and mark the center of your folded pocket.
Step 10: Cut a piece of ribbon long enough to tie around the pocket.
Step 11: Sew this to the center front of the pocket
Step 12: Organize your needles by pinning them through the felt sheet. (Or sheets plural, if you are anything like me.)
Step 13: Unfold your pocket fabric and put your needle sheets in the center of your fabric. Fold the pocket up around it and tie the tote closed. Voile! You're done - go enjoy your new tote.


No comments:
Post a Comment