I've decided to ring in the new year of blogging with another quiche recipe, although this one is a bit lighter (I feel) than the previous one that I did back in - EEK!- August of 2018. Ahh, how time flies when you are busy procrastinating and taking care of 22 animals of assorted varieties. At any rate, this recipe was tested out on Christmas morning when I was forbidden from doing our usual breakfast of sticky buns, welsh pancakes with orange sauce, and baked eggs because we were planning on doing that the day after Christmas so that my sister and her fiance could partake and my mom said "absolutely not" to doing it two days in a row. She's in weight watchers and is, in general, a killjoy when it comes to the creation and consumption of tasty treats. I did modify this recipe a bit as it originally called for mushrooms and I tend to think of them as being very slug-like once cooked and, therefore, inedible. The general consensus was that it was a very good quiche so I am passing along the recipe to you, gentle reader.
Three cheese vegetable quiche
1 Pillsbury refrigerated pie crust, softened to room temperature
1 tablespoon vegetable oil
1/2 red onion, diced
1 cup milk (I used both whole milk and 2% and both quiches came out fine)
2 large handfuls (approximately 3-4 cups) fresh spinach, diced
1 teaspoon dried minced shallots (or onion)
3 egg whites, lightly beaten
2 eggs, lightly beaten
1/4 teaspoon salt
1/4 teaspoon pepper
1/2 cup Gouda cheese, shredded
1/2 cup smoked Gouda cheese, shredded
3/4 cup Cheddar cheese, shredded
Heat the oven to 350 degrees F. Roll the pie crust out into a 9-inch glass pie pan and crimp the edges as needed. Prick the crust all over with a fork and bake for 10-12 minutes. Take out and set aside.
While the pie shell is baking you can work on the filling. In a skillet, heat the vegetable oil and add the red onion and cook over medium high heat until tender, about 4 or 5 minutes. Let cool slightly.
In a large bowl, combine the milk, spinach, minced shallots or onion, egg whites, eggs, salt, and pepper and stir until all the ingredients are well mixed. Stir in the cooled onions, as well as the Gouda and Cheddar cheeses. Pour the whole mixture into the pre-baked pie shell and bake for 35-40 minutes, or until the center is puffed up and light golden brown. Let cool and set up for 10 minutes before serving. Serves 6.
Showing posts with label recipe. Show all posts
Showing posts with label recipe. Show all posts
Monday, January 7, 2019

Monday, August 13, 2018
Crustless vegetable quiche
The other day, desperate for a change for dinner from our usual rotation of spaghetti, macaroni and cheese, rice and beans, and stir fry, I found this recipe online and adapted it for what we had on hand and to accommodate my intense hatred of mushrooms. (I tend to think that they have the texture of a slug - not that I have ever eaten a slug but I've seen enough of them to get a rough idea of their probable texture.) I got rid of the mushrooms entirely and replaced broccoli for the asparagus originally called for. I also used a slightly smaller zucchini than was stated in the original recipe because, although I am a vegetarian, I tend not to like vegetables. My general opinion on the categorization of fruits and vegetables is this: if it tastes good, it is a fruit; if it tastes bad it's clearly a vegetable. All in all, although this recipe is full of veggies, it wasn't bad. I would even go so far as to call it quite good. And if you dice the vegetables small enough you might even get a picky eater (such as myself) to eat their greens.
The prep time is about 20 minutes, depending upon how meticulous you are with your dicing, and the cook time is about an hour. Additionally, even though we ate this for dinner I'm sure it would make a good breakfast or brunch dish as well.
8 egg whites
4 whole eggs
1/2 cup skim milk
1 teaspoon salt
1 teaspoon dried oregano
1/4 teaspoon dried thyme
1/4 teaspoon pepper
16 oz fat free cottage cheese
1 cup shredded monterey jack cheese, divided
1 cup shredded cheddar cheese, divided
1/3 cup flour
1 teaspoon baking powder
1/2 of a yellow onion, diced
1 medium zucchini, diced
2 cups broccoli, diced
1 - 2 tomatoes, diced, seeds removed
Preheat oven to 400 degrees F and spray a 3 quart casserole dish with cooking spray. In a large bowl, whisk together the egg whites and eggs until fluffy. Add in the cottage cheese, 3/4 cup shredded cheddar, 3/4 cup shredded monterey jack, milk, flour, baking powder, 1/2 teaspoon of salt, oregano, thyme, and pepper. In a large skillet over medium high heat, saute the onion, zucchini, and broccoli with the remaining 1/2 teaspoon of salt for about 5 minutes or until tender. Add the cooked vegetables and the diced tomato to the egg mixture and fold everything together. Pour into the casserole dish and top it with the remaining shredded cheese. Place it in the oven on the middle rack. Bake for 15 minutes at 400 degrees then lower the temperature to 350 degrees (leaving the quiche inside the oven) and bake for another 45-55 minutes or until it is set and lightly browned.
The prep time is about 20 minutes, depending upon how meticulous you are with your dicing, and the cook time is about an hour. Additionally, even though we ate this for dinner I'm sure it would make a good breakfast or brunch dish as well.
8 egg whites
4 whole eggs
1/2 cup skim milk
1 teaspoon salt
1 teaspoon dried oregano
1/4 teaspoon dried thyme
1/4 teaspoon pepper
16 oz fat free cottage cheese
1 cup shredded monterey jack cheese, divided
1 cup shredded cheddar cheese, divided
1/3 cup flour
1 teaspoon baking powder
1/2 of a yellow onion, diced
1 medium zucchini, diced
2 cups broccoli, diced
1 - 2 tomatoes, diced, seeds removed
Preheat oven to 400 degrees F and spray a 3 quart casserole dish with cooking spray. In a large bowl, whisk together the egg whites and eggs until fluffy. Add in the cottage cheese, 3/4 cup shredded cheddar, 3/4 cup shredded monterey jack, milk, flour, baking powder, 1/2 teaspoon of salt, oregano, thyme, and pepper. In a large skillet over medium high heat, saute the onion, zucchini, and broccoli with the remaining 1/2 teaspoon of salt for about 5 minutes or until tender. Add the cooked vegetables and the diced tomato to the egg mixture and fold everything together. Pour into the casserole dish and top it with the remaining shredded cheese. Place it in the oven on the middle rack. Bake for 15 minutes at 400 degrees then lower the temperature to 350 degrees (leaving the quiche inside the oven) and bake for another 45-55 minutes or until it is set and lightly browned.
Tuesday, November 15, 2016
Banana bread, and why Scout doesn't like it
Banana bread
The original recipe was found in the Pillsbury complete cook book and included 1/2 cup chopped nuts that I usually leave out.
3/4 cup sugar
1/2 cup butter or margarine, softened
2 eggs
2 medium bananas, ripe (if frozen, let thaw)
1/3 cup milk
1 teaspoon vanilla
2 cups flour
1 teaspoon baking soda
1/2 teaspoon salt
Preheat oven to 350 degrees F. Grease the bottom of a 9x5 or 8x4 inch loaf pan. Mix sugar and margarine in a large bowl and beat until light and fluffy. Add the eggs and beat well. Add the bananas, milk and vanilla and blend well. In a smaller bowl, combine flour, baking soda, and salt and stir well. Add the dry mixture to the banana mixture and stir just until the dry ingredients are moistened, then pour into your greased loaf pan. Bake for 55-65 minutes or until a toothpick inserted in the center of the loaf comes out clean. Cool 5 minutes, then turn out onto a wire rack to cool completely. Once cooled, wrap tightly and store in the refrigerator.
Our freezer is full of, among other things, a large collection of over ripe bananas. No longer suitable for eating plain they get tossed into the freezer until someone - usually me - decides to thin them out by making a batch or two (or three or four) of banana bread. That was the case a few days ago when I managed to fit a triple batch of banana bread into our mixer - just barely - and made up three loaves of banana bread that I left to cool on the counter. Naturally I took precautions - I pulled out the bread boards effectively pushing the banana bread to the back of the counter where Scout can't reach it. Unfortunately, Scout figured out that he could push the bread boards back in. Now we practice basic math: if you made three loaves of banana bread and you only see two sitting on the counter, how many loaves did your mischievious dog make off with?
Yep, Scout got a whole loaf of banana bread and had eaten at least a third of it before he was caught red handed, and he had slobbered all over the rest of it so the whole loaf was ruined. It wasn't a total loss though - the chickens had a field day with the other half of the loaf. I have yet to discover who might be the mastermind of these kitchen raids - the chickens benefit nearly as often as Scout does. Whoever was behind it, the plan backfired for Scout. It seems that a large portion of banana bread consumed all at once does not do the digestive system any favors as Scout was gassy for days afterwards. The next day he was offered a small piece of banana bread as a treat but would not touch it, having apparently grown sick of it. But as Scout is a slow learner I'm sure it will only be a matter of time before the process repeats itself with some other treat from the kitchen - he has already gotten a third of a jar of peanut butter a couple of months ago. Until then we can at least pretend that he is a good boy. Right?
The original recipe was found in the Pillsbury complete cook book and included 1/2 cup chopped nuts that I usually leave out.
3/4 cup sugar
1/2 cup butter or margarine, softened
2 eggs
2 medium bananas, ripe (if frozen, let thaw)
1/3 cup milk
1 teaspoon vanilla
2 cups flour
1 teaspoon baking soda
1/2 teaspoon salt
Preheat oven to 350 degrees F. Grease the bottom of a 9x5 or 8x4 inch loaf pan. Mix sugar and margarine in a large bowl and beat until light and fluffy. Add the eggs and beat well. Add the bananas, milk and vanilla and blend well. In a smaller bowl, combine flour, baking soda, and salt and stir well. Add the dry mixture to the banana mixture and stir just until the dry ingredients are moistened, then pour into your greased loaf pan. Bake for 55-65 minutes or until a toothpick inserted in the center of the loaf comes out clean. Cool 5 minutes, then turn out onto a wire rack to cool completely. Once cooled, wrap tightly and store in the refrigerator.
Our freezer is full of, among other things, a large collection of over ripe bananas. No longer suitable for eating plain they get tossed into the freezer until someone - usually me - decides to thin them out by making a batch or two (or three or four) of banana bread. That was the case a few days ago when I managed to fit a triple batch of banana bread into our mixer - just barely - and made up three loaves of banana bread that I left to cool on the counter. Naturally I took precautions - I pulled out the bread boards effectively pushing the banana bread to the back of the counter where Scout can't reach it. Unfortunately, Scout figured out that he could push the bread boards back in. Now we practice basic math: if you made three loaves of banana bread and you only see two sitting on the counter, how many loaves did your mischievious dog make off with?
Yep, Scout got a whole loaf of banana bread and had eaten at least a third of it before he was caught red handed, and he had slobbered all over the rest of it so the whole loaf was ruined. It wasn't a total loss though - the chickens had a field day with the other half of the loaf. I have yet to discover who might be the mastermind of these kitchen raids - the chickens benefit nearly as often as Scout does. Whoever was behind it, the plan backfired for Scout. It seems that a large portion of banana bread consumed all at once does not do the digestive system any favors as Scout was gassy for days afterwards. The next day he was offered a small piece of banana bread as a treat but would not touch it, having apparently grown sick of it. But as Scout is a slow learner I'm sure it will only be a matter of time before the process repeats itself with some other treat from the kitchen - he has already gotten a third of a jar of peanut butter a couple of months ago. Until then we can at least pretend that he is a good boy. Right?
Monday, October 3, 2016
Rustic pear tarts
Let's lighten the mood a bit. Here's a recipe for pear tarts that are quite good and pretty simple to make. The original recipe came out of Sunset magazine but I've altered it a bit, mostly out of laziness, a lack of some ingredients on hand, and the fact that it grosses me out to brush raw egg on something (hence the milk instead, but feel free to use egg if it doesn't bother you.)
Rustic Pear Tarts
1 sheet (about 10x12 inches) frozen puff pastry, thawed (14 oz package)
2 or 3 firm-ripe pears such as Bosc or Comice; Asian pears will work as well
1/2 cup orange marmalade
1/4 to 1/3 cup milk
1/4 cup turbinado sugar
Whipped cream, optional
Preheat the oven to 375 degrees F. Lightly grease two large baking sheets. Flour a work surface and rolling pin and roll the pastry out to about 16x18 inches. Cut the pastry into six rectangles and transfer the pasties to the baking sheets. Core the pears or Asian pears and cut them into thin wedges and arrange them on the pastry rectangles leaving a border of about 1 1/2 inches bare. Warm the marmalade in the microwave and pour some over each pastry, then brush to distribute. Fold the border over the edges of the pears. Stretch slightly and press down to hold. Brush the edges with the milk then sprinkle the sugar over the tarts, especially getting the edges. Bake until the pastries are richly browned, about 25 to 30 minutes. Serve with whipped cream if desired.
Rustic Pear Tarts
1 sheet (about 10x12 inches) frozen puff pastry, thawed (14 oz package)
2 or 3 firm-ripe pears such as Bosc or Comice; Asian pears will work as well
1/2 cup orange marmalade
1/4 to 1/3 cup milk
1/4 cup turbinado sugar
Whipped cream, optional
Preheat the oven to 375 degrees F. Lightly grease two large baking sheets. Flour a work surface and rolling pin and roll the pastry out to about 16x18 inches. Cut the pastry into six rectangles and transfer the pasties to the baking sheets. Core the pears or Asian pears and cut them into thin wedges and arrange them on the pastry rectangles leaving a border of about 1 1/2 inches bare. Warm the marmalade in the microwave and pour some over each pastry, then brush to distribute. Fold the border over the edges of the pears. Stretch slightly and press down to hold. Brush the edges with the milk then sprinkle the sugar over the tarts, especially getting the edges. Bake until the pastries are richly browned, about 25 to 30 minutes. Serve with whipped cream if desired.
Thursday, September 22, 2016
Minestrone soup and mini cornbread
Having grown tired of our usual last minute dinner stand by options of macaroni and cheese, rice and beans, or stir-fry I decided to make something different for dinner the other night and it turned out pretty well so I am passing along the recipe. I am also including a recipe for three mini cornbread. Since my brother has been in Australia and is not around to inhale any bread we bake I decided to split our regular recipe so we wouldn't end up with leftovers that sit around for a week before finally being crumbled up and fed to the chickens. Sorry, ladies.
Minestrone soup
1 tablespoon olive oil
2 cups (about 2 small) zucchini, cubed
1 finely chopped onion
2 cups carrots, cubed
2 cloves garlic, minced
1 15oz can crushed tomatoes, undrained
1 15 oz can white beans, rinsed and drained
1 15 oz can kidney beans, rinsed and drained
1 quart vegetable broth
2 teaspoons sugar
1/4 to 1/2 teaspoon salt
1/2 to 1 teaspoon Italian seasoning
Parmesan or mozzarella cheese, if desired
Heat olive oil in a large saucepan over medium heat until hot while you cut up the carrots. Add the carrots and cook several minutes while you cut up the zucchini and onion. Add the zucchini, onion, and garlic to the pan and cook approximately three minutes or until the onion is tender, stirring often. Stir in all the remaining ingredients and bring the soup to a boil. Reduce the heat to low. Cover and simmer ten to fifteen minutes or until carrots are tender. Sprinkle servings with Parmesan or mozzarella cheese if desired.
Mini cornbread (makes 3)
1/4 cup yellow cornmeal
3/4 cup flour
1/4 cup sugar
1/3 tablespoon baking powder
scant 1/4 teaspoon salt
1/4 cup oil
1/3 cup milk
1 egg, beaten
Preheat oven to 400 degrees F. Mix all the dry ingredients together in a bowl. Slowly pour in the milk and oil, then add the egg. Stir just enough to blend the ingredients thoroughly. Grease three 4 inch ramekins and divide the dough between the three ramekins and level the dough with a spatula. Bake for approximately 20 minutes until a toothpick inserted in the center comes out clean.
Minestrone soup
1 tablespoon olive oil
2 cups (about 2 small) zucchini, cubed
1 finely chopped onion
2 cups carrots, cubed
2 cloves garlic, minced
1 15oz can crushed tomatoes, undrained
1 15 oz can white beans, rinsed and drained
1 15 oz can kidney beans, rinsed and drained
1 quart vegetable broth
2 teaspoons sugar
1/4 to 1/2 teaspoon salt
1/2 to 1 teaspoon Italian seasoning
Parmesan or mozzarella cheese, if desired
Heat olive oil in a large saucepan over medium heat until hot while you cut up the carrots. Add the carrots and cook several minutes while you cut up the zucchini and onion. Add the zucchini, onion, and garlic to the pan and cook approximately three minutes or until the onion is tender, stirring often. Stir in all the remaining ingredients and bring the soup to a boil. Reduce the heat to low. Cover and simmer ten to fifteen minutes or until carrots are tender. Sprinkle servings with Parmesan or mozzarella cheese if desired.
Mini cornbread (makes 3)
1/4 cup yellow cornmeal
3/4 cup flour
1/4 cup sugar
1/3 tablespoon baking powder
scant 1/4 teaspoon salt
1/4 cup oil
1/3 cup milk
1 egg, beaten
Preheat oven to 400 degrees F. Mix all the dry ingredients together in a bowl. Slowly pour in the milk and oil, then add the egg. Stir just enough to blend the ingredients thoroughly. Grease three 4 inch ramekins and divide the dough between the three ramekins and level the dough with a spatula. Bake for approximately 20 minutes until a toothpick inserted in the center comes out clean.
Tuesday, August 12, 2014
Chocolate chip zucchini bread
It is summer and time for fresh vegetables, which means that we have an abundance of zucchini and we need to find something to do with it all. My mom likes to roast it and eat it seasoned with other vegetables but that doesn't work for me as I do not actually like zucchini unless I can't taste it. Enter zucchini bread. But even that is too healthy for me so I added chocolate chips to the recipe and it turned out pretty good - edible, even. In case you are also suffering from a glut of zucchini here is the recipe to try out.
2 cups sugar
1 cup vegetable oil
3 eggs
3 teaspoons vanilla
2 1/2 cups all-purpose flour
1 teaspoon salt
1 teaspoon baking soda
1 teaspoon cinnamon
1/4 teaspoon baking powder
2 cups of peeled, shredded zucchini
1 cup chocolate chips
Preheat the oven to 350 degrees F. In a large mixing bowl beat the sugar, vegetable oil, eggs, and vanilla together until well blended. In a separate bowl combine the flour, salt, cinnamon, baking soda, and baking powder and mix well. Slowly beat the dry mixture into the wet mixture until the dry mixture is well incorporated. Stir in the zucchini and the chocolate chips. Grease two 8x4 inch loaf pans and split the batter between the two loaf pans, filling them approximately half way. Bake for 50-60 minutes or until a toothpick inserted in the loaf comes out clean. Let the loaves cool for 10 minutes and then turn the loaves out onto racks to cool completely. If you want to bake mini loaves, try cutting the baking time down to about half an hour.
This produces a loaf in which you can't really taste the zucchini and you get little bits of sweetness from the chocolate chips throughout the loaf. Enjoy!
2 cups sugar
1 cup vegetable oil
3 eggs
3 teaspoons vanilla
2 1/2 cups all-purpose flour
1 teaspoon salt
1 teaspoon baking soda
1 teaspoon cinnamon
1/4 teaspoon baking powder
2 cups of peeled, shredded zucchini
1 cup chocolate chips
Preheat the oven to 350 degrees F. In a large mixing bowl beat the sugar, vegetable oil, eggs, and vanilla together until well blended. In a separate bowl combine the flour, salt, cinnamon, baking soda, and baking powder and mix well. Slowly beat the dry mixture into the wet mixture until the dry mixture is well incorporated. Stir in the zucchini and the chocolate chips. Grease two 8x4 inch loaf pans and split the batter between the two loaf pans, filling them approximately half way. Bake for 50-60 minutes or until a toothpick inserted in the loaf comes out clean. Let the loaves cool for 10 minutes and then turn the loaves out onto racks to cool completely. If you want to bake mini loaves, try cutting the baking time down to about half an hour.
This produces a loaf in which you can't really taste the zucchini and you get little bits of sweetness from the chocolate chips throughout the loaf. Enjoy!
Sunday, June 15, 2014
MORE ice cream sandwiches: lemon cookies with vanilla ice cream
I already posted a recipe for gingersnap ice cream sandwiches, but I have to admit that gingersnaps are not my favorite cookie and after making a batch of sandwiches for my dad, I felt the need to make a batch that my mom and I could enjoy. Enter: lemon cookies! The only problem was that I didn't have a good lemon cookie recipe so off to the internet I went and I managed to discover this treat on this blog: http://www.laurenslatest.com/.
Lemon crinkles
1/2 cup butter, softened
1 cup sugar
1/2 teaspoon vanilla
1 egg
1 teaspoon fresh lemon zest
1 tablespoon fresh lemon juice
1/4 teaspoon salt
1/4 teaspoon baking powder
1/8 teaspoon baking soda
1 1/2 cups flour
powdered sugar for rolling
Note: If you are planning on chilling the dough you won't need to preheat the oven yet.
Preheat oven to 350 degrees F. Cream the butter and sugar until light and fluffy. Beat in the vanilla, egg, lemon zest and lemon juice. Scrape the sides if needed. Stir in all the dry ingredients until combined. If desired, chill the dough for easier handling. Roll into balls about 1 1/2 to 2 inches across and then roll in the powdered sugar. Place the balls onto greased, dark baking sheets about 3 inches apart. Bake for 9-11 minutes until the bottoms just start to turn golden and the cookies start to crack. Remove from oven and let cool on the sheets for 5 minutes or until well set, and then transfer them to a rack to cool completely.
More notes: the original recipe says to mix the dry ingredients until just combined but I mixed them well and they seemed to turn out fine. The original recipe also says to use light baking sheets but I did my batch half and half, on both light and dark sheets and the batch on the dark sheets spread out less and kept a slightly thicker, rounder shape that worked better for me.
You can find the original recipe here: http://www.laurenslatest.com/lemon-crinkle-cookies/.
Time to make the sandwiches! Let some vanilla ice cream thaw out a bit until it is slightly softened.
Set out pieces of plastic wrap to be ready to wrap your sandwiches. Take one cookie and place it upside down. Use an ice cream scoop to scoop out a ball of the slightly softened vanilla ice cream and place it on top of the cookie. Take a second cookie and gently press down onto the ice cream, flattening out the ice cream and spreading it to the edges. If excess ice cream squeezes out of the sandwich just take a knife or your finger and smooth around the edges. Place the sandwich in the center of the plastic and tightly wrap the sandwich and then place into the freezer. Freeze for a couple hours and then enjoy. If you, like me, have trouble waiting for a couple hours for anything containing sugar, then you can also set aside one to have right away. These are delicious and well worth the little bit of work it takes to make them.
 |
| These lemon cookie sandwiches with vanilla ice cream are delicious! |
Lemon crinkles
1/2 cup butter, softened
1 cup sugar
1/2 teaspoon vanilla
1 egg
1 teaspoon fresh lemon zest
1 tablespoon fresh lemon juice
1/4 teaspoon salt
1/4 teaspoon baking powder
1/8 teaspoon baking soda
1 1/2 cups flour
powdered sugar for rolling
Note: If you are planning on chilling the dough you won't need to preheat the oven yet.
Preheat oven to 350 degrees F. Cream the butter and sugar until light and fluffy. Beat in the vanilla, egg, lemon zest and lemon juice. Scrape the sides if needed. Stir in all the dry ingredients until combined. If desired, chill the dough for easier handling. Roll into balls about 1 1/2 to 2 inches across and then roll in the powdered sugar. Place the balls onto greased, dark baking sheets about 3 inches apart. Bake for 9-11 minutes until the bottoms just start to turn golden and the cookies start to crack. Remove from oven and let cool on the sheets for 5 minutes or until well set, and then transfer them to a rack to cool completely.
More notes: the original recipe says to mix the dry ingredients until just combined but I mixed them well and they seemed to turn out fine. The original recipe also says to use light baking sheets but I did my batch half and half, on both light and dark sheets and the batch on the dark sheets spread out less and kept a slightly thicker, rounder shape that worked better for me.
You can find the original recipe here: http://www.laurenslatest.com/lemon-crinkle-cookies/.
Time to make the sandwiches! Let some vanilla ice cream thaw out a bit until it is slightly softened.
Set out pieces of plastic wrap to be ready to wrap your sandwiches. Take one cookie and place it upside down. Use an ice cream scoop to scoop out a ball of the slightly softened vanilla ice cream and place it on top of the cookie. Take a second cookie and gently press down onto the ice cream, flattening out the ice cream and spreading it to the edges. If excess ice cream squeezes out of the sandwich just take a knife or your finger and smooth around the edges. Place the sandwich in the center of the plastic and tightly wrap the sandwich and then place into the freezer. Freeze for a couple hours and then enjoy. If you, like me, have trouble waiting for a couple hours for anything containing sugar, then you can also set aside one to have right away. These are delicious and well worth the little bit of work it takes to make them.
Ice cream sandwiches: gingerbread cookie with vanilla ice cream
In honor of father's day I decided to make these ice cream sandwiches because of the many things my father likes (cheese, broccoli, beets, chocolate, taffy, etc), gingersnaps and ice cream are also high on the list. So for a father's day treat I decided to combine these two loves into one delicious treat. I briefly contemplated making beet cookies with cheddar ice cream but decided I wasn't ready to be quite so adventurous. I don't think my dad was too crushed with my choice.
Gingersnap cookies
1 cup sugar
3/4 cup butter or margarine, softened
1 egg
1/4 cup molasses
2 cups flour
2 teaspoons baking soda
1/2 teaspoon salt
1/4 teaspoon ground cloves
1/4 teaspoon ground ginger
1/4 cup chopped crystallized ginger (totally optional)
Sugar for rolling dough in
Note: if you are chilling the dough, you don't need to preheat the oven yet.
Preheat oven to 375 degrees F. Cream the butter and sugar until fluffy. Beat in the egg and molasses. Stir in all the remaining ingredients until well mixed, scraping the sides if needed. At this point you may want to refrigerate the dough to make it easier to handle. Roll the dough into balls about 1 1/2 or 2 inches across. Try to keep them equal in size. Roll the balls in sugar to coat them, then place them 3 inches apart on greased dark baking sheets. Bake cookies for 9-12 minutes or until the edges are set and the tops have started cracking. Remove from the oven and let them cool on the sheets for at least 5 minutes. When they are well set, move them to racks to cool completely.
When they are totally cool you are ready to make your sandwiches.
Set out pieces of plastic wrap to be ready to wrap your sandwiches. Take one cookie and place it upside down. Use an ice cream scoop to scoop out a ball of slightly softened vanilla ice cream and place it on top of the cookie. Take a second cookie and gently press down onto the ice cream, flattening out the ice cream and spreading it to the edges. If excess ice cream squeezes out of the sandwich just take a knife or your finger and smooth around the edges. Place the sandwich in the center of the plastic and tightly wrap the sandwich and then place into the freezer. Freeze for a couple hours and then enjoy.
 |
| Yumm... It may not look perfect but I find that taste buds care about personality more than looks. |
Gingersnap cookies
1 cup sugar
3/4 cup butter or margarine, softened
1 egg
1/4 cup molasses
2 cups flour
2 teaspoons baking soda
1/2 teaspoon salt
1/4 teaspoon ground cloves
1/4 teaspoon ground ginger
1/4 cup chopped crystallized ginger (totally optional)
Sugar for rolling dough in
Note: if you are chilling the dough, you don't need to preheat the oven yet.
Preheat oven to 375 degrees F. Cream the butter and sugar until fluffy. Beat in the egg and molasses. Stir in all the remaining ingredients until well mixed, scraping the sides if needed. At this point you may want to refrigerate the dough to make it easier to handle. Roll the dough into balls about 1 1/2 or 2 inches across. Try to keep them equal in size. Roll the balls in sugar to coat them, then place them 3 inches apart on greased dark baking sheets. Bake cookies for 9-12 minutes or until the edges are set and the tops have started cracking. Remove from the oven and let them cool on the sheets for at least 5 minutes. When they are well set, move them to racks to cool completely.
When they are totally cool you are ready to make your sandwiches.
Set out pieces of plastic wrap to be ready to wrap your sandwiches. Take one cookie and place it upside down. Use an ice cream scoop to scoop out a ball of slightly softened vanilla ice cream and place it on top of the cookie. Take a second cookie and gently press down onto the ice cream, flattening out the ice cream and spreading it to the edges. If excess ice cream squeezes out of the sandwich just take a knife or your finger and smooth around the edges. Place the sandwich in the center of the plastic and tightly wrap the sandwich and then place into the freezer. Freeze for a couple hours and then enjoy.
Sunday, June 1, 2014
Recipe: elephant ears
I don't know about you, but I have a serious sweet tooth which makes fried bread covered in sugar almost irresistible. Unfortunately, these sugary treats are sometimes hard to come by, unless you happen to live next to a year round fairgrounds - which I don't. Fortunately, I found a recipe. My sweet tooth is happy with this discovery, my waistline is less so. Make these at your own risk.
Elephant ears
1 1/2 cups milk (3/4 cups)
1 teaspoon salt (1/2 teaspoon)
3/8 cups (6 tablespoons) coconut oil (3 tablespoons)
2 tablespoons sugar (1 tablespoon)
2 tablespoons yeast (1 tablespoon)
4 cups flour (2 cups)
1 quart of oil for frying
Topping:
Melted butter/margarine (at least 1/4 cup)
Cinnamon sugar: mix sugar and cinnamon to achieve the desired (this amount will depend on the amount of topping you want - probably 1 cup at least for a good layer of sugar)
Put the milk, salt, sugar, and coconut oil in a small saucepan and combine over medium heat. Heat until the coconut oil melts and the sugar is dissolved. Take it off the heat and let it cool until it is about 110 degrees F. Sprinkle the yeast on top and let sit for a couple minutes before stirring in the yeast. Wait for the mixture to proof, becoming foamy. Pour the mixture into a larger bowl and stir in the flour until a dough forms. Flour a surface and knead until smooth. Cover it and let it sit for at least 30 minutes while it rises.
In a large saucepan or heavy skillet, heat the oil to 375 degrees F. Keep an eye on the oil - you don't want to overheat it. Meanwhile, roll out small balls of dough into thin sheets. The size of the sheets will depend on the size of the pan the oil is in: the sheets need to be smaller than the pan, with room to flip them. Place the sheets, one at a time, into the oil and let cook until the underside is a light golden brown (this will not take long.) Use tongs to flip the sheet and let the other side cook. Once the sheet is cooked, put it on a plate and brush it with the melted butter and sprinkle on the cinnamon sugar. Do the same for the other side. Repeat for the rest of the dough. Best served right away.
Some notes: The amounts in parentheses are the amounts you would use for a half batch, which is what I suggest making unless you have a large number of people that are going to help you eat the results. Even with the half batch you should have help: it makes approximately 10 ears 6 to 8 inches in diameter. You can wrap extra dough and store it in the fridge for a day or two if needed. Let it warm up again when you are ready to use it. If I don't feel like melting butter I will sometimes use that spray margarine stuff, it seems to work just as well.
Elephant ears
1 1/2 cups milk (3/4 cups)
1 teaspoon salt (1/2 teaspoon)
3/8 cups (6 tablespoons) coconut oil (3 tablespoons)
2 tablespoons sugar (1 tablespoon)
2 tablespoons yeast (1 tablespoon)
4 cups flour (2 cups)
1 quart of oil for frying
Topping:
Melted butter/margarine (at least 1/4 cup)
Cinnamon sugar: mix sugar and cinnamon to achieve the desired (this amount will depend on the amount of topping you want - probably 1 cup at least for a good layer of sugar)
Put the milk, salt, sugar, and coconut oil in a small saucepan and combine over medium heat. Heat until the coconut oil melts and the sugar is dissolved. Take it off the heat and let it cool until it is about 110 degrees F. Sprinkle the yeast on top and let sit for a couple minutes before stirring in the yeast. Wait for the mixture to proof, becoming foamy. Pour the mixture into a larger bowl and stir in the flour until a dough forms. Flour a surface and knead until smooth. Cover it and let it sit for at least 30 minutes while it rises.
In a large saucepan or heavy skillet, heat the oil to 375 degrees F. Keep an eye on the oil - you don't want to overheat it. Meanwhile, roll out small balls of dough into thin sheets. The size of the sheets will depend on the size of the pan the oil is in: the sheets need to be smaller than the pan, with room to flip them. Place the sheets, one at a time, into the oil and let cook until the underside is a light golden brown (this will not take long.) Use tongs to flip the sheet and let the other side cook. Once the sheet is cooked, put it on a plate and brush it with the melted butter and sprinkle on the cinnamon sugar. Do the same for the other side. Repeat for the rest of the dough. Best served right away.
Some notes: The amounts in parentheses are the amounts you would use for a half batch, which is what I suggest making unless you have a large number of people that are going to help you eat the results. Even with the half batch you should have help: it makes approximately 10 ears 6 to 8 inches in diameter. You can wrap extra dough and store it in the fridge for a day or two if needed. Let it warm up again when you are ready to use it. If I don't feel like melting butter I will sometimes use that spray margarine stuff, it seems to work just as well.
Tuesday, April 15, 2014
Tasty Vegetarian Chili
I'm not usually a huge fan of chili but this one is pretty good. A few notes: I tend to like my food more on the mild side so I only use one tablespoon of chili powder and I like my vegetables best if they are small enough that I can't recognize them as actual vegetables unless viewed under a microscope so I tend to chop the pepper and onion pretty small. I have also found that I like the chili a little bit more moist than this recipe turns out so I just add in a small amount of water (approximately 1/8 cup to 1 cup chili) into my individual bowl before I eat. That way people can choose the amount of liquid they want with their chili. I eat this plain, but it would probably also be good with a little bit of shredded mozzarella sprinkled on top and melted, or sour cream.
1 tablespoon vegetable oil
1 chopped bell pepper (3/4 to 1 cup)
1/2 chopped onion (about 1/2 cup)
1 (15 or 16 ounce) can of 50% less sodium garbanzo beans
1 (15 or 16 ounce) can of cannellini beans (white kidney beans)
1 (29 ounce) can of gold hominy
1 to 2 tablespoons of chili powder (depending on how spicy you like it)
1 (14.5 ounce) can of fire roasted diced tomatoes
1 (15 ounce) can of tomato sauce
1 tablespoon brown sugar
Heat the vegetable oil in a large pot over medium high heat. Add the onion and bell pepper and cook until tender, about 4 or 5 minutes. Drain and rinse well both beans and the hominy and add it to the pot along with the chili powder. Stir and cook about 2 minutes. Stir in the tomato sauce and roasted tomatoes (undrained); add the brown sugar and stir. Bring the chili to boiling then reduce the heat, cover the pot and let it simmer 25 minutes. Stir occasionally. Serve warm. This recipe makes enough for about 4 servings.
1 tablespoon vegetable oil
1 chopped bell pepper (3/4 to 1 cup)
1/2 chopped onion (about 1/2 cup)
1 (15 or 16 ounce) can of 50% less sodium garbanzo beans
1 (15 or 16 ounce) can of cannellini beans (white kidney beans)
1 (29 ounce) can of gold hominy
1 to 2 tablespoons of chili powder (depending on how spicy you like it)
1 (14.5 ounce) can of fire roasted diced tomatoes
1 (15 ounce) can of tomato sauce
1 tablespoon brown sugar
Heat the vegetable oil in a large pot over medium high heat. Add the onion and bell pepper and cook until tender, about 4 or 5 minutes. Drain and rinse well both beans and the hominy and add it to the pot along with the chili powder. Stir and cook about 2 minutes. Stir in the tomato sauce and roasted tomatoes (undrained); add the brown sugar and stir. Bring the chili to boiling then reduce the heat, cover the pot and let it simmer 25 minutes. Stir occasionally. Serve warm. This recipe makes enough for about 4 servings.
Sunday, October 27, 2013
Single serve sticky buns
My brother's girlfriend, Rachel, has been baking up a storm lately. Chocolate croissants, monkey bread, cupcakes, banana bread... you get the idea, and all this baking has made me feel like I'm dropping the ball and should be baking more. My mom, who is in Weight Watchers, disagrees and thinks I bake more than enough as it is. But I have seen one too many facebook posts of delicious baked goods on Rachel's page and I have been spurred into action.
Unfortunately, while Rachel and I share a love of baking, we do not share the same metabolism. If I were to guess, I would have to say that she has the metabolism of a hummingbird which means that she could probably eat nothing but cupcakes for a month and still stay as thin as a twig. My metabolism is probably closer to that of a bear, which enables me to put on and carry weight, without the added benefit of a months long hibernation period in which to burn it all off. With this in mind I have altered a monkey bread/sticky bun recipe to create this single serve version, because left alone with a regular sized batch of sticky buns I can assure you that any willpower I have would crumble and I shudder to think how many of those delicious sticky buns I would inhale.

Single Serve Sticky Buns
2 biscuits from a package of refrigerated, ready-made biscuits (regular, not the flaky kind), cut into quarters
1 tablespoon butter or margarine
1/4 teaspoon cinnamon
1 tablespoon brown sugar*
1 heavy tablespoon marshmallow fluff*
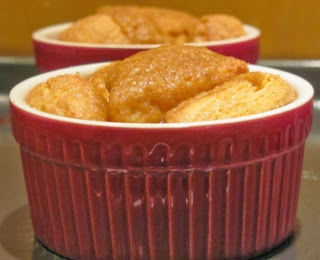
Preheat the oven to 350 degrees F. Grease a small ramekin and put the cut biscuits inside. In a microwave safe container, melt the butter and marshmallow fluff until soft (about 20 seconds or so) and stir together, adding the cinnamon and sugar and mixing until well combined. Microwave for additional time if needed, until you have a pourable mixture. Pour the entire mix over the biscuits in the ramekin and place in the oven on a cookie sheet (to catch any drips) and bake for approximately 18 minutes. When finished baking, let cool for five minutes, then turn upside down onto a plate and tip out of the ramekin. Serve warm.
*Should you desire sticky buns with more sweet, gooey sauce, just add a little extra sugar and/or marshmallow fluff. (It is possible that I have already tested this version and could vouch for the deliciousness.)
This recipe can easily be doubled or tripled to serve more people. It makes a great dessert that is quick and easy. And tasty. And should you decide to make two and eat them both, well, no judgement here.
Unfortunately, while Rachel and I share a love of baking, we do not share the same metabolism. If I were to guess, I would have to say that she has the metabolism of a hummingbird which means that she could probably eat nothing but cupcakes for a month and still stay as thin as a twig. My metabolism is probably closer to that of a bear, which enables me to put on and carry weight, without the added benefit of a months long hibernation period in which to burn it all off. With this in mind I have altered a monkey bread/sticky bun recipe to create this single serve version, because left alone with a regular sized batch of sticky buns I can assure you that any willpower I have would crumble and I shudder to think how many of those delicious sticky buns I would inhale.

Single Serve Sticky Buns
2 biscuits from a package of refrigerated, ready-made biscuits (regular, not the flaky kind), cut into quarters
1 tablespoon butter or margarine
1/4 teaspoon cinnamon
1 tablespoon brown sugar*
1 heavy tablespoon marshmallow fluff*
Preheat the oven to 350 degrees F. Grease a small ramekin and put the cut biscuits inside. In a microwave safe container, melt the butter and marshmallow fluff until soft (about 20 seconds or so) and stir together, adding the cinnamon and sugar and mixing until well combined. Microwave for additional time if needed, until you have a pourable mixture. Pour the entire mix over the biscuits in the ramekin and place in the oven on a cookie sheet (to catch any drips) and bake for approximately 18 minutes. When finished baking, let cool for five minutes, then turn upside down onto a plate and tip out of the ramekin. Serve warm.
*Should you desire sticky buns with more sweet, gooey sauce, just add a little extra sugar and/or marshmallow fluff. (It is possible that I have already tested this version and could vouch for the deliciousness.)
This recipe can easily be doubled or tripled to serve more people. It makes a great dessert that is quick and easy. And tasty. And should you decide to make two and eat them both, well, no judgement here.

Sunday, July 7, 2013
Maia's Meatballs
Maia has become increasingly uninterested in eating her food, causing her to lose more weight than I would like. To try and reverse this weight loss, we have taken to supplementing her dry food diet with extra calories in the form of a variety of treats, cheeses, meats, eggs and beef jerky. It is quite possible Maia is milking this weight loss for all she can and is fully enjoying this recent change in her diet. But as we estimate that she is approximately seventeen years old, we are willing to give her almost anything she will eat. Chocolate, however, is still not on the menu and it will remain that way; sorry, Maia.
For a while, Maia was willing to eat her dry food as long as we mixed it with some warm ground turkey, but in typical Maia fashion she has recently come to the conclusion that the formerly acceptable meal is now subpar and no amount of cajoling on our part will change her mind. Her behavior has meant that I have had to get creative in trying to get any amount of nutrition into her, hence the following recipe that I developed a few days ago. So far, it seems to have earned the Maia seal of approval, and hopefully it will remain that way. For at least another week, the standard time frame it takes for Maia to decide that she should abandon yet another formerly acceptable food source.
Maia's Meatballs
For a while, Maia was willing to eat her dry food as long as we mixed it with some warm ground turkey, but in typical Maia fashion she has recently come to the conclusion that the formerly acceptable meal is now subpar and no amount of cajoling on our part will change her mind. Her behavior has meant that I have had to get creative in trying to get any amount of nutrition into her, hence the following recipe that I developed a few days ago. So far, it seems to have earned the Maia seal of approval, and hopefully it will remain that way. For at least another week, the standard time frame it takes for Maia to decide that she should abandon yet another formerly acceptable food source.
Maia's Meatballs
approximately 3 pounds ground turkey
2 cups rolled oats
¼ cup better in the raw powder*
¼ cup ground flax seed
½ cup finely chopped broccoli
¼ teaspoon garlic powder
1 egg
*Better in the Raw powder is a nutritional supplemental powder designed for a raw food diet that we had left over from the raw food diet Buddy was on in an attempt to improve his health. You could leave it out if you want, or perhaps use this recipe in a raw diet, omitting the baking step. I'll leave it up to you.
Mix all of the ingredients together and form the mixture into balls about 1 -2 tablespoons in size. Place onto greased baking sheets and bake for 30-40 minutes at 350 degrees F, depending on how brown you want them. Store in an airtight container in the fridge or freeze the excess. They can easily be rewarmed in the microwave before serving, or cut into smaller pieces for little dogs or dogs that prefer smaller bites. Or those that think they should be fed pieces of food the size of grapes, while reclining on a chaise lounge, being fanned with palm fronds, a la Maia.
Subscribe to:
Posts (Atom)